
Creating & Managing Users
Organization admins can invite teammates into your Quali-Fi organization and control what they can access using roles and permissions.
Where to manage users
User management lives under Administration → Organization Settings → User Management → Users.
Users whose role includes Manage Users or Manage Organization Settings can open this screen. Inviting users also needs Invite Users. Deleting a user requires Manage Users.
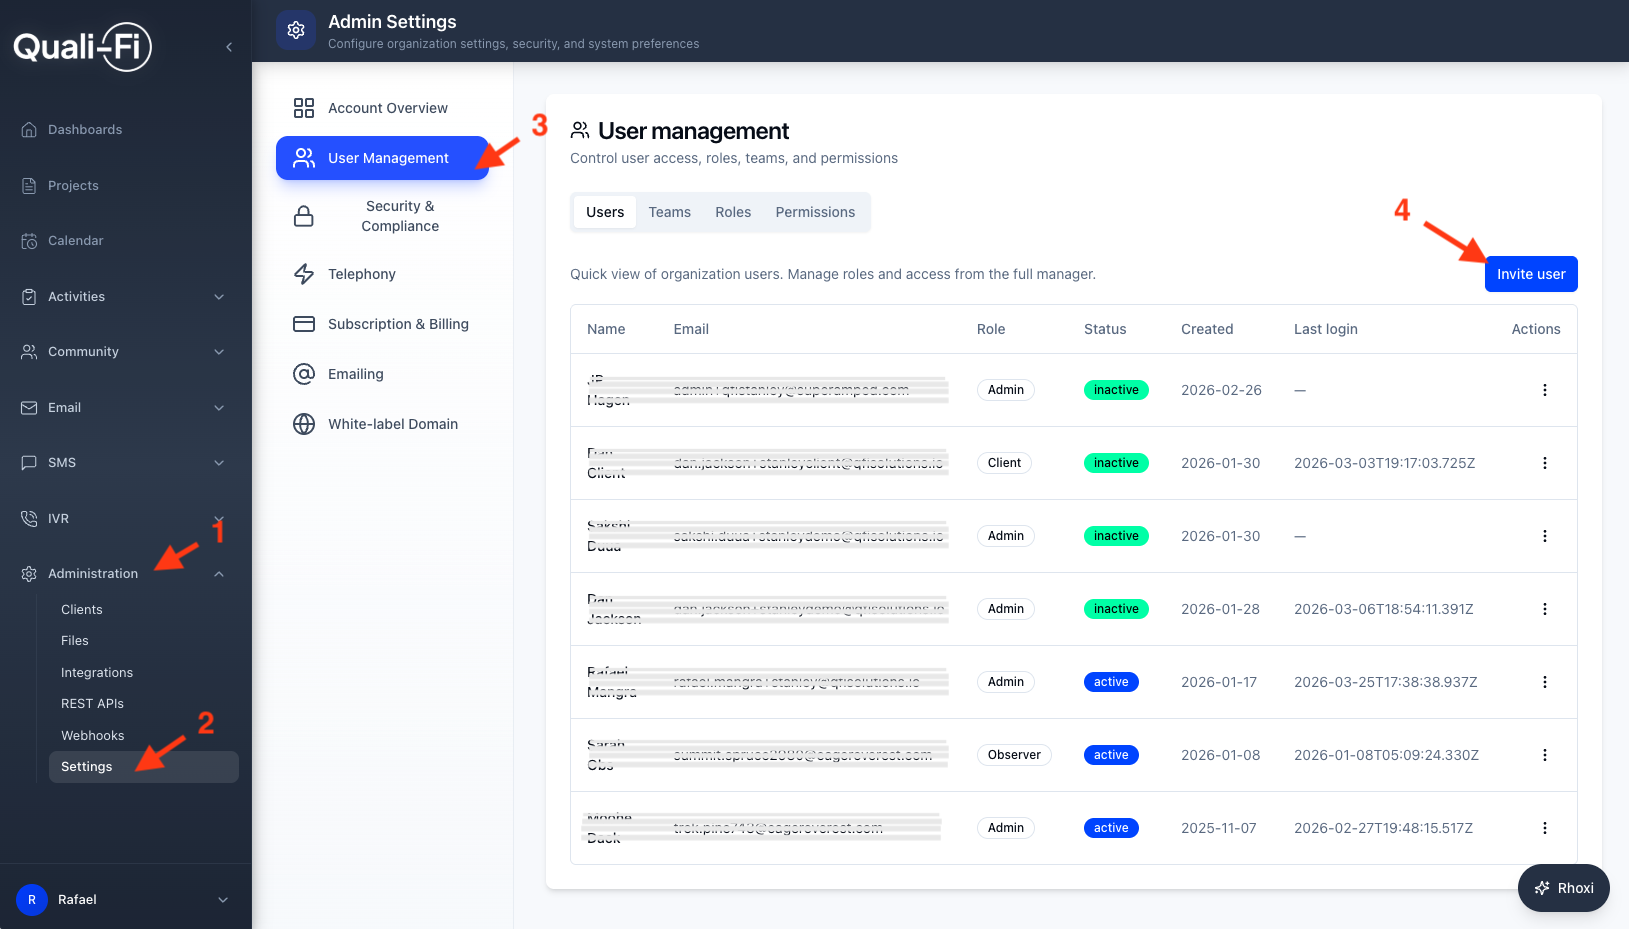
Invite a new user
Inviting a user sends them a secure email link to set their password.
Go to Organization Settings → User Management → Users.
Click Invite user.
Enter:
- First name
- Last name
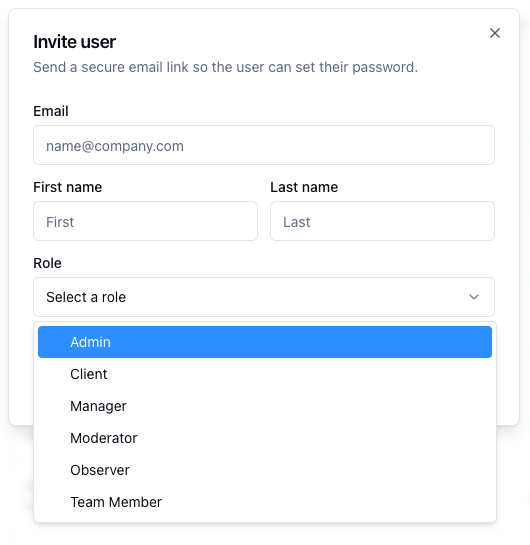
(Optional) Select a Role.
Click Send invite.
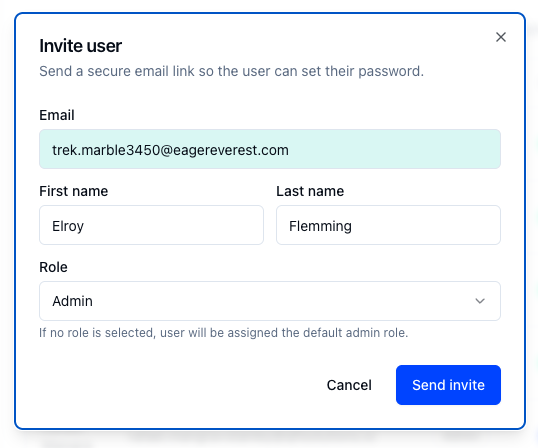
What the invited user receives
The invited user receives an email with a link that allows them to set their password.
Note
The invitation link expires after a short time. If the user reports that the link expired, send a new invite.
Choose the right role
Roles determine what the user can access and which actions they can perform.
- For a full breakdown, see: Roles & Permissions
Edit an existing user
You can update basic user profile fields from the Users list.
Go to Organization Settings → User Management → Users.
Find the user in the list.
Open the row actions menu and choose Edit.
Update the user’s:
- First name
- Last name
- Role
Click Save changes.
Disable or enable a user
From the same row actions menu, choose Disable (active users) or Enable (inactive users). Disabled users cannot sign in; their seat handling follows your organization’s plan limits.
Delete a user
From the row actions menu, choose Delete, then confirm. Deletion is permanent and frees the email for a normal signup later.
You cannot delete the last active organization Admin. Assign Admin to another active user first.
Warning
Deleting a user cannot be undone. Prefer Disable when you only need to revoke access temporarily.
Common issues
Seat / user limit reached
If your organization has reached its plan’s active-user limit, you may not be able to invite additional users until you:
- Upgrade your plan or increase seats (if applicable)
- Deactivate existing users (if your org policy allows it)
Note
If you believe your seat count is incorrect, contact support with your organization name and the email address you attempted to invite.
Invite email not received
- Confirm the email address is correct.
- Ask the user to check spam/junk folders.
- If the email still doesn’t arrive, try sending the invite again.